Note: the illustrations on this page are indicative; there are some graphical differences between versions and OS and smartphone variations.
eScoopFone is available for iOS and Android devices.
First you need an account on AETA’s SIP server. In many cases that is provided to you by your organization or a partner. Otherwise please contact us to purchase one. The conditions are similar to a Premium SIP account (see the related page).
You can get the eScoopFone app for free:
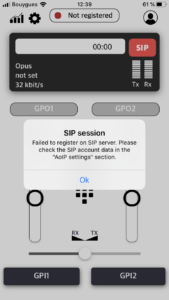
Once the app is installed, when you launch it you get an error message because the SIP registration fails:
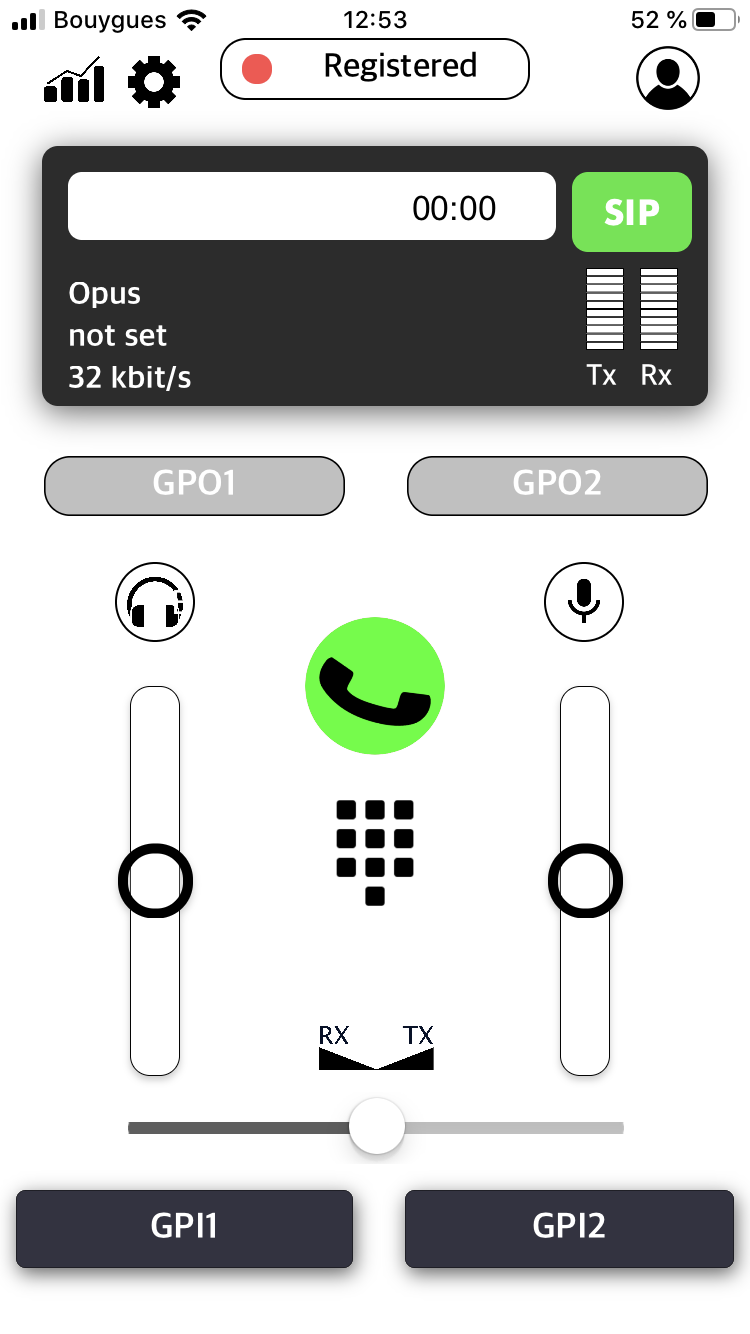
Now you must enter the SIP account’s credentials into the app: go to “Settings” ( ![]() icon), “AoIP settings” sub-menu, and enter the SIP number and the password you have been provided. Tap “Update”, come back to the main screen and you’re done! The green “SIP” box shows that the app is registered on the server:
icon), “AoIP settings” sub-menu, and enter the SIP number and the password you have been provided. Tap “Update”, come back to the main screen and you’re done! The green “SIP” box shows that the app is registered on the server:
Alternative method: you might have been provided a settings file that includes the SIP credentials. In this case, you just have to “share” this file and “Copy to eScoopFone”. The app opens ready and registered on the SIP server.
Method 1 : direct dialling
Now you can set up an audio link with any audio codec registered on AETA’s server. What you need is just its SIP number. Tap the keypad and enter this number.
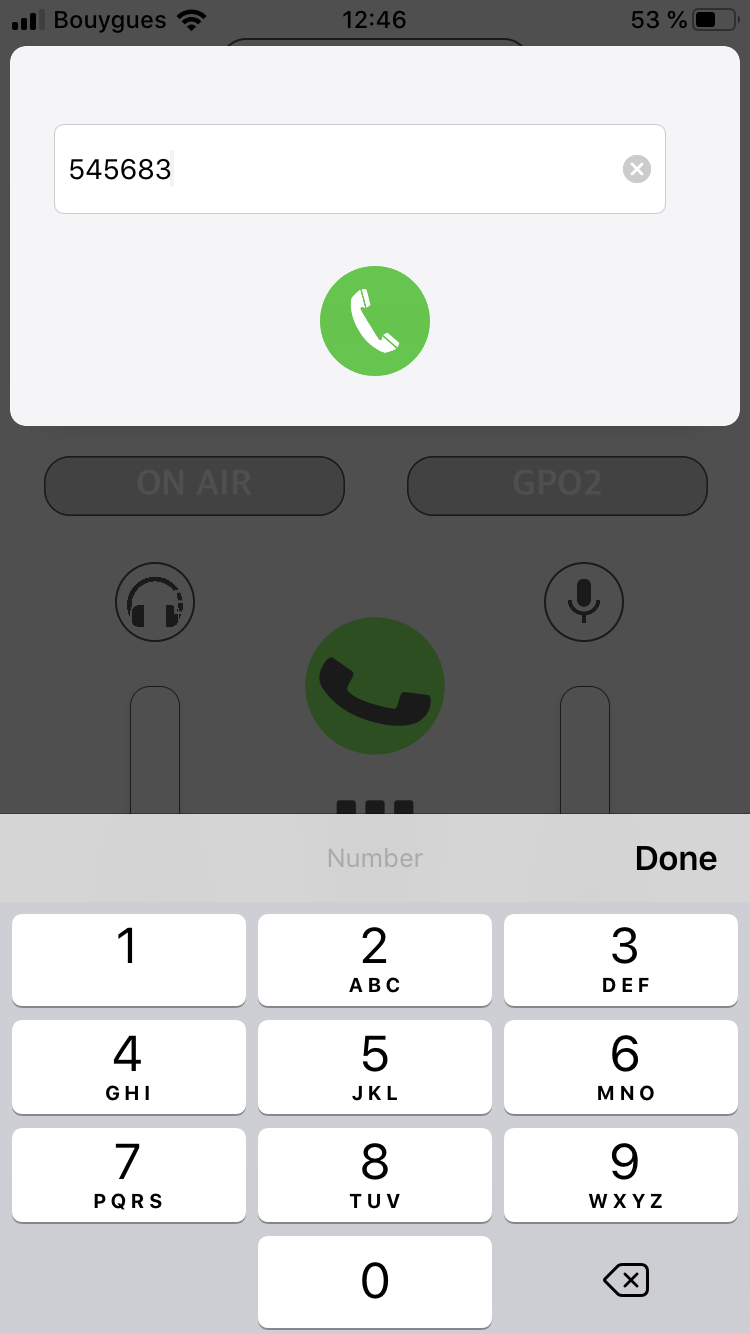
Tap the geen phone icon: the app calls the remote party and the link is set, normally using the Opus coding (G722 or G711 in case the remote party doesn’t support Opus).
To stop the connection, just tap the red phone icon. Then tap the green phone to call again, etc.
Method 2 : using the directory
You will probably find it more convenient to use the “Profile” directory when it contains the list of contacts relevant for you (this directory can be easily shared/imported).
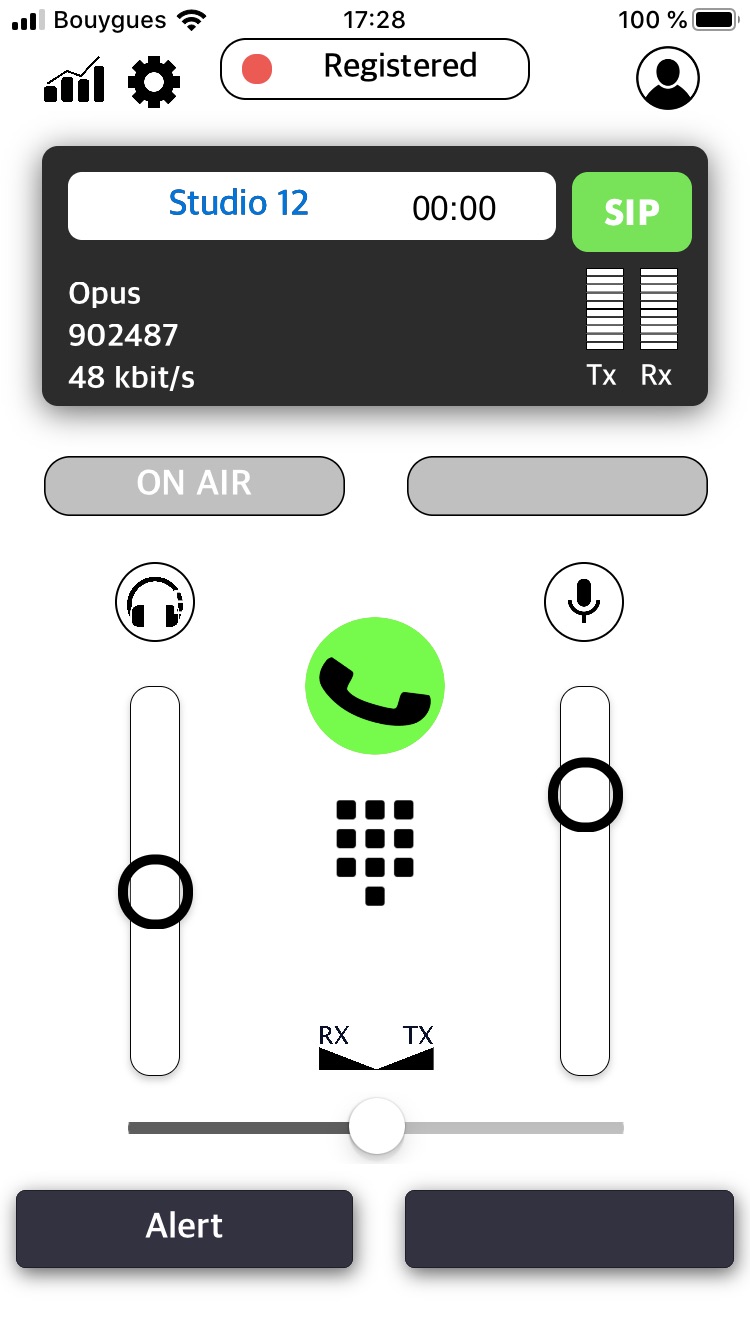
Tap the profile icon ![]() and you are shown the list of existing profiles. Tap the one you want and it is loaded in the app, with its name displayed on the screen.
and you are shown the list of existing profiles. Tap the one you want and it is loaded in the app, with its name displayed on the screen.
Tap the green phone button and the session is started. To stop the connection, just tap the red phone icon. Then tap the green phone to call again, etc.
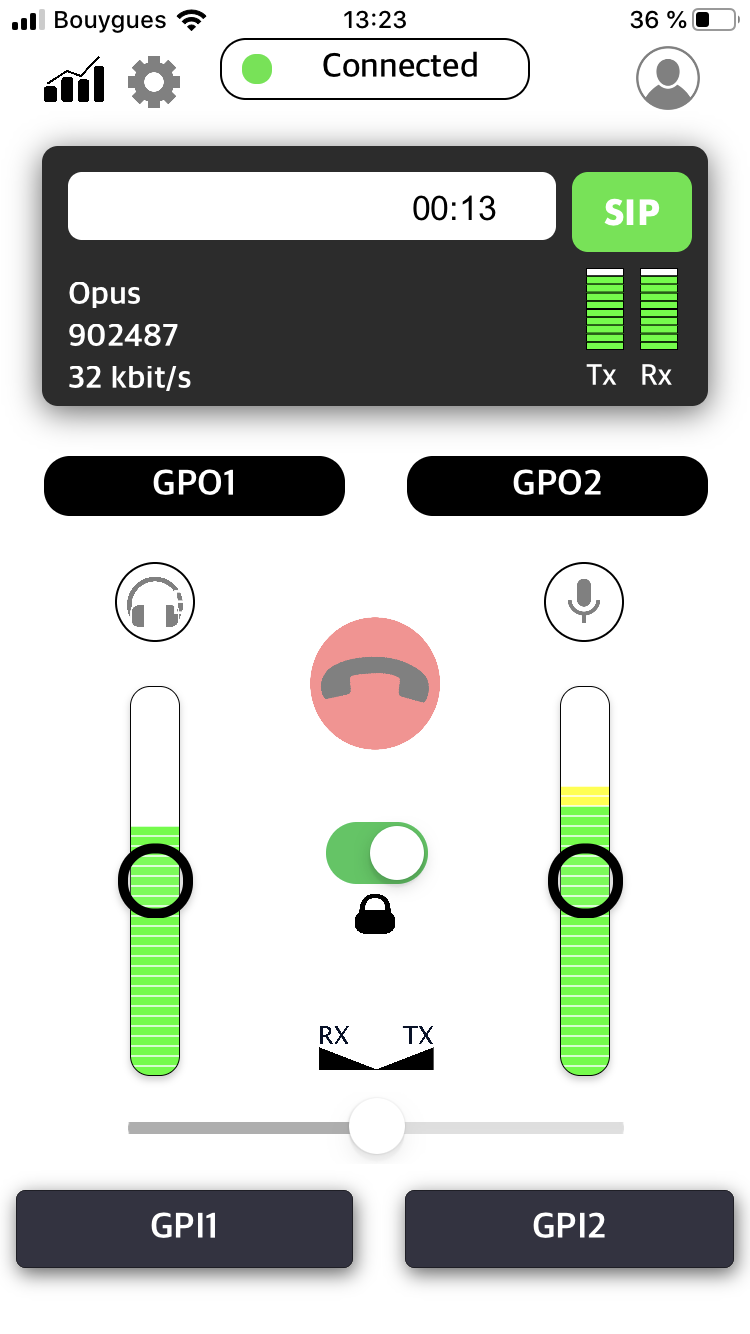
During the session
The left bargraph shows the audio level as received from the remote end, the right bargraph shows the signal sent to the remote end.
You can adjust the level of the sent signal (cursor over the right bargraph), and adjust the level of the output to the loudspeaker or headphone (cursor on the left bargraph). Note that the general system volume (side buttons on the smartphone) are still operative too!
The “balance” cursor under the bargraphs allow you to adjust the mix of the microphone and the received signal that you get at the output. Full left: listen to only the remote end, full right: listen only to the microphone (local feed back).
Tap the “mic” icon and this mutes the sent signal; tap the “headphone” icon and this mutes the received signal.
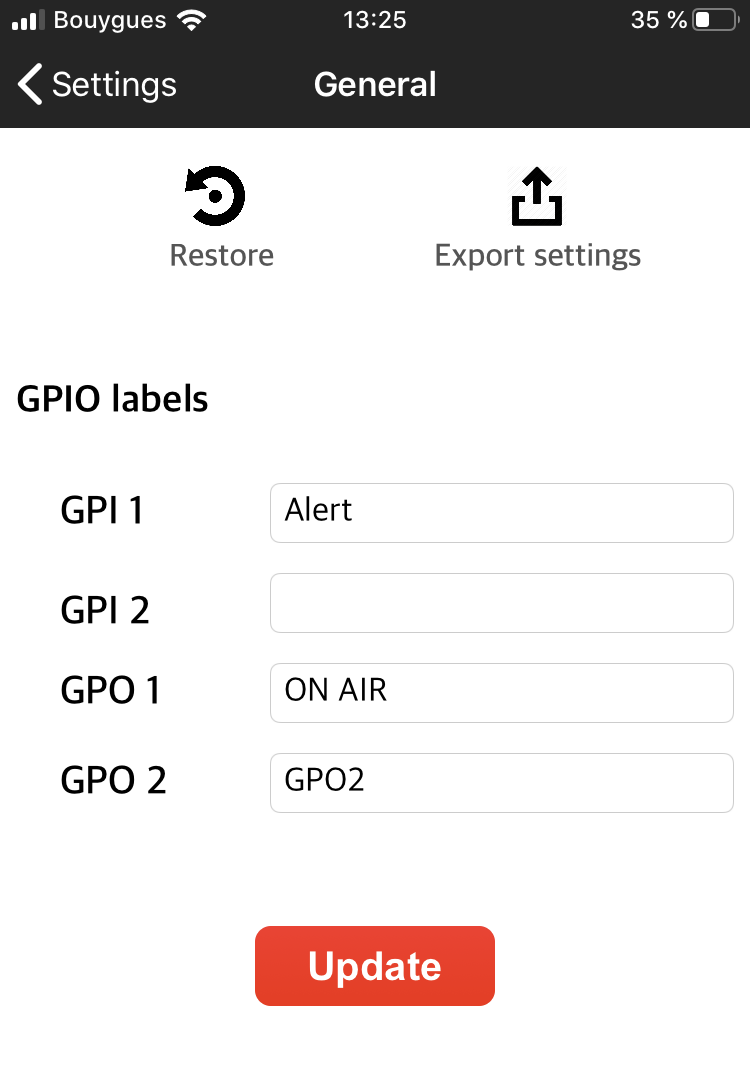
“GPI” and “GPO” : when connected with an AETA codec at the remote end, you can exchange digital information with it. Tap to activate a GPI button, and a corresponding state is transmitted to the remote end. Tap again to deactivate it. Conversely, the GPO indicators show the states as sent by the remote end. The labels of these GPI/GPO can be customized, see “advanced settings” further.
Switch on the “padlock” to get protected against undesired changes or actions on the app during the connection. Switch it off again to regain control.
From the “Profile” menu you can:
AoIP Settings

General settings
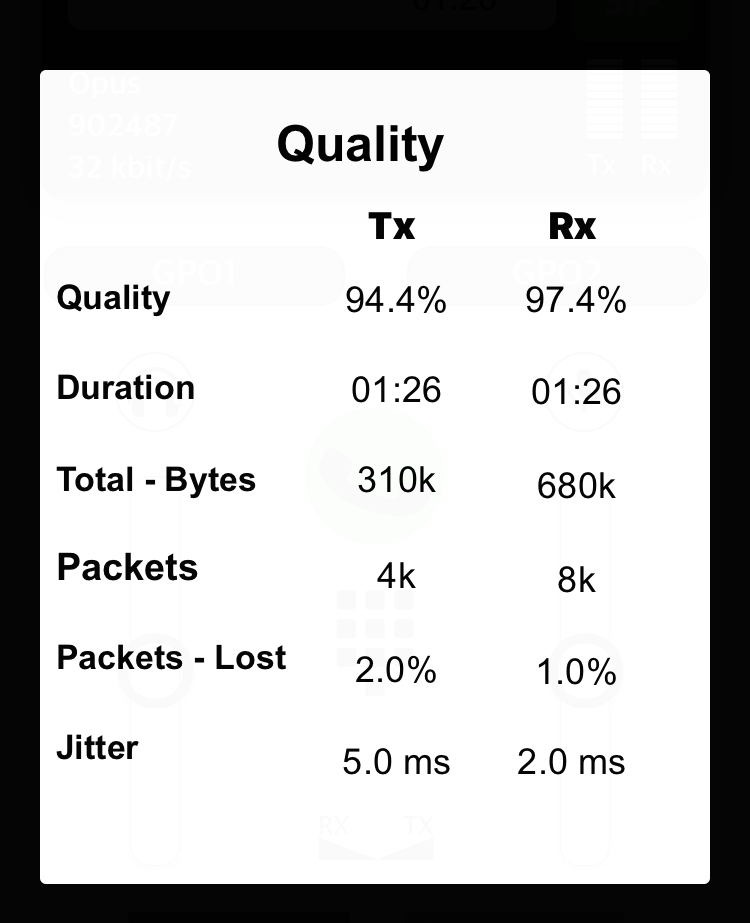
Quality monitoring
Power management
On some devices, the power optimization may stop the application when it is in the background, when the device enters the sleep mode, etc. In such case, if you want to keep the app permanently active and registered, you may have to adjust the system settings and customize the handling of eScoopFone. The suitable settings widely depend on the OS and the devices; usually you can find these under sections such as “Battery”, “Power management”, “Battery optimization”, “Apps and notifications”, “App launch”…
